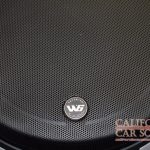
 A client from San Jose dropped in at California Car Sounds and Tint for an audio system upgrade that included a custom QX56 sub enclosure. We posted about the entire build recently, but wanted to take a closer look at the subwoofer system we designed in some detail. The client brought us a pair of JL Audio 12W6 subs and challenged us to come up with a solution that would sound great without taking up valuable cargo space in his SUV.
Enclosure Design Process
The size of the enclosure and how it is constructed play a huge role in determining how the system will perform. We started by determining how much air volume the subwoofers would require, then headed to the vehicle to find an appropriate location.
Most subwoofer enclosures end up in the cargo area of a vehicle. They are built into the side panel, built into the floor or simply placed in the back. That wasn’t going to work for this client.
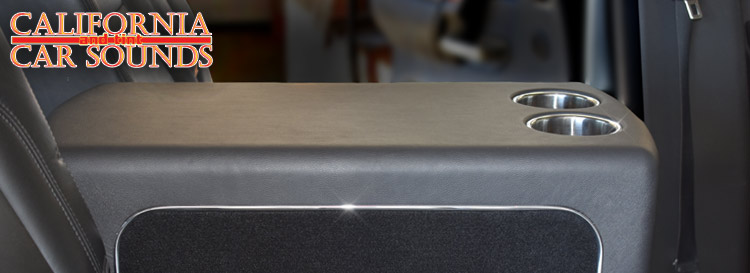
We took notice of the large console between the middle-row seats and, after a few measurements, realized that would be an ideal location. That meant we would have to recreate the console to make it suitable to function as the QX56 sub enclosure.
Stack Fab Construction
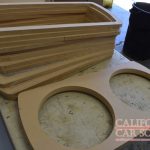
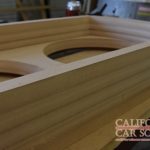
Our lead technician Aaron removed the center console and started making detailed measurements and calculations. The plan was to fire the 12-inch subwoofers at the floor, then add some class, style and functionality to the enclosure with cup holders and the use of several different materials.
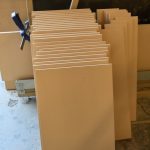
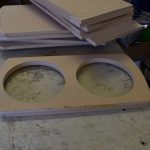
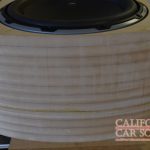
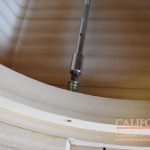
With a plan in place, Aaron set to work cutting 20 pieces of ¾-inch MDF to fit the space between the seats. Using several of our Kingpin and Mobile Solutions templates as guides, we created a curved shape on the front and rear edges of the first sheet, then cut out two round openings for the subwoofers. We used a tracing bit on our router to duplicate this panel.
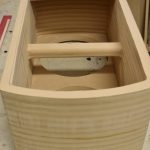
The next 12 sheets are cut out in the center, leaving a 1-inch-thick wall around the perimeter. We left two horizontal braces in two of the pieces to attach the opposite sides of the enclosure to add rigidity.
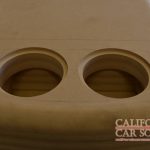
Finally, at the 15th panel, we shrank the opening in the top so it would serve as the bottom of the cup-holder area. Three more layers with the reduced main chamber area and a small cavity for the cup holders, then it was time for the twin-layer top panel.
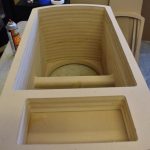
QX56 Sub Enclosure Finishing Process
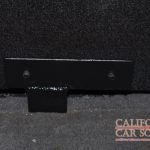
We created a set of feet for the enclosure to space it off the floor and allow the subs to move without running into the carpet. The feet use the same stacked construction technique to follow the shape of the enclosure.
To ensure the subwoofers would remain serviceable, we added threaded inserts into the rear of the subwoofer mounting surface.
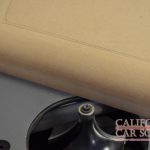
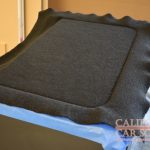
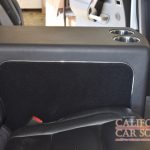
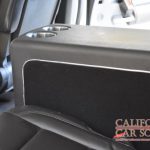
Using our Mobile Solutions adjustable template system, we created a small relief on the sides of the enclosure with a router. The center sections are finished with soft black carpet so they will be comfortable to sit against. The edge of the carpet fits nicely over the edge of the relief.
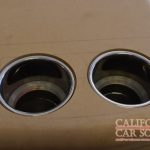
The back, top and front of the enclosure are wrapped in a single piece of vinyl that matches the leather on the seats nicely. The final touch was to add a chrome accent in the relief on the sides and mount the stainless steel cup holders in place.
Vehicle Installation
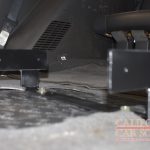
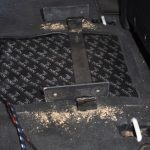
Aaron created a steel bracket to secure the enclosure to factory fastener locations on the floor of the SUV. The brackets extend up the sides of the enclosure and a set of hex-head cap screws keeps everything in place.
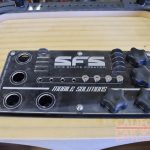
With the subwoofers installed and wired to the Focal FPX1.1000 amplifier under the driver’s seat, it was time to give the system a listen. We were thoroughly impressed with the results. The bass is rock-solid, with good extension and dynamics. The center row seats remain fully functional and third-row access isn’t impeded in any way.
If you are looking for a unique subwoofer solution for your vehicle, drop by California Car Sounds in Campbell and speak with a member of our team. You can also reach us by e-mail using our online contact form.
Leave a Reply